How SilverHand Works
Three integrated systems work together to amplify hand function: biomechanical mechanism, EMG signal processing, and real-time control.
Biomechanics & Mechanism
The exoskeleton uses a servo-driven linkage system mounted on the dorsal (back) side of the hand. MG996R servos provide actuation force, transmitted through a four-bar linkage to finger segments. This design amplifies the user's residual grip strength while maintaining natural finger kinematics.
The mechanism is designed for flexion assistance: when activated, servos rotate to pull linkages that guide fingers into a closed (grasping) position. Springs provide passive extension, allowing the hand to open when the servos release. This approach minimizes power consumption and heat buildup.
Custom 3D-printed parts ensure a lightweight structure (~150g total) that can be worn for extended periods without fatigue. Adjustable straps accommodate different hand sizes.
Mechanical deep dive →
Diagram: Servo linkage and finger actuation mechanism

Diagram: EMG analog front-end and signal path
EMG Sensing & Signal Path
Surface electromyography (EMG) electrodes placed on the forearm detect electrical activity from muscles controlling finger flexion. The signal chain includes:
- Instrumentation amplifier (INA128): Differential amplification with high common-mode rejection to isolate muscle signals from noise
- Bandpass filter (10–500 Hz): Removes DC offset and high-frequency interference, preserving EMG spectral content
- Rectification and envelope detection: Full-wave rectification followed by low-pass filtering to extract signal amplitude
- ADC sampling (Arduino Nano): 10-bit resolution at 500 Hz captures envelope for threshold detection
This analog front-end converts microvolt-level EMG signals (~50–500 µV) into a clean amplitude envelope suitable for real-time control decisions.
Electronics deep dive →Control Architecture
The control system uses a threshold-based classifier to map EMG amplitude to servo position. The Raspberry Pi Zero 2 W runs a Python control loop that:
- Reads EMG envelope from Arduino Nano via serial (USB)
- Applies user-specific calibration threshold (set during initialization)
- Generates servo position commands based on EMG level (proportional control)
- Sends PWM signals to MG996R servos via Raspberry Pi Pico (I²C bridge)
The Raspberry Pi Pico handles low-level servo timing with microsecond precision, offloading real-time PWM generation from the Pi Zero. This architecture achieves ~30ms end-to-end latency from muscle activation to servo motion.
Calibration involves the user flexing their forearm muscles at maximum voluntary contraction (MVC) and rest, establishing baseline and activation thresholds. A simple state machine prevents unintended activations from noise or fatigue-induced drift.
Control model deep dive →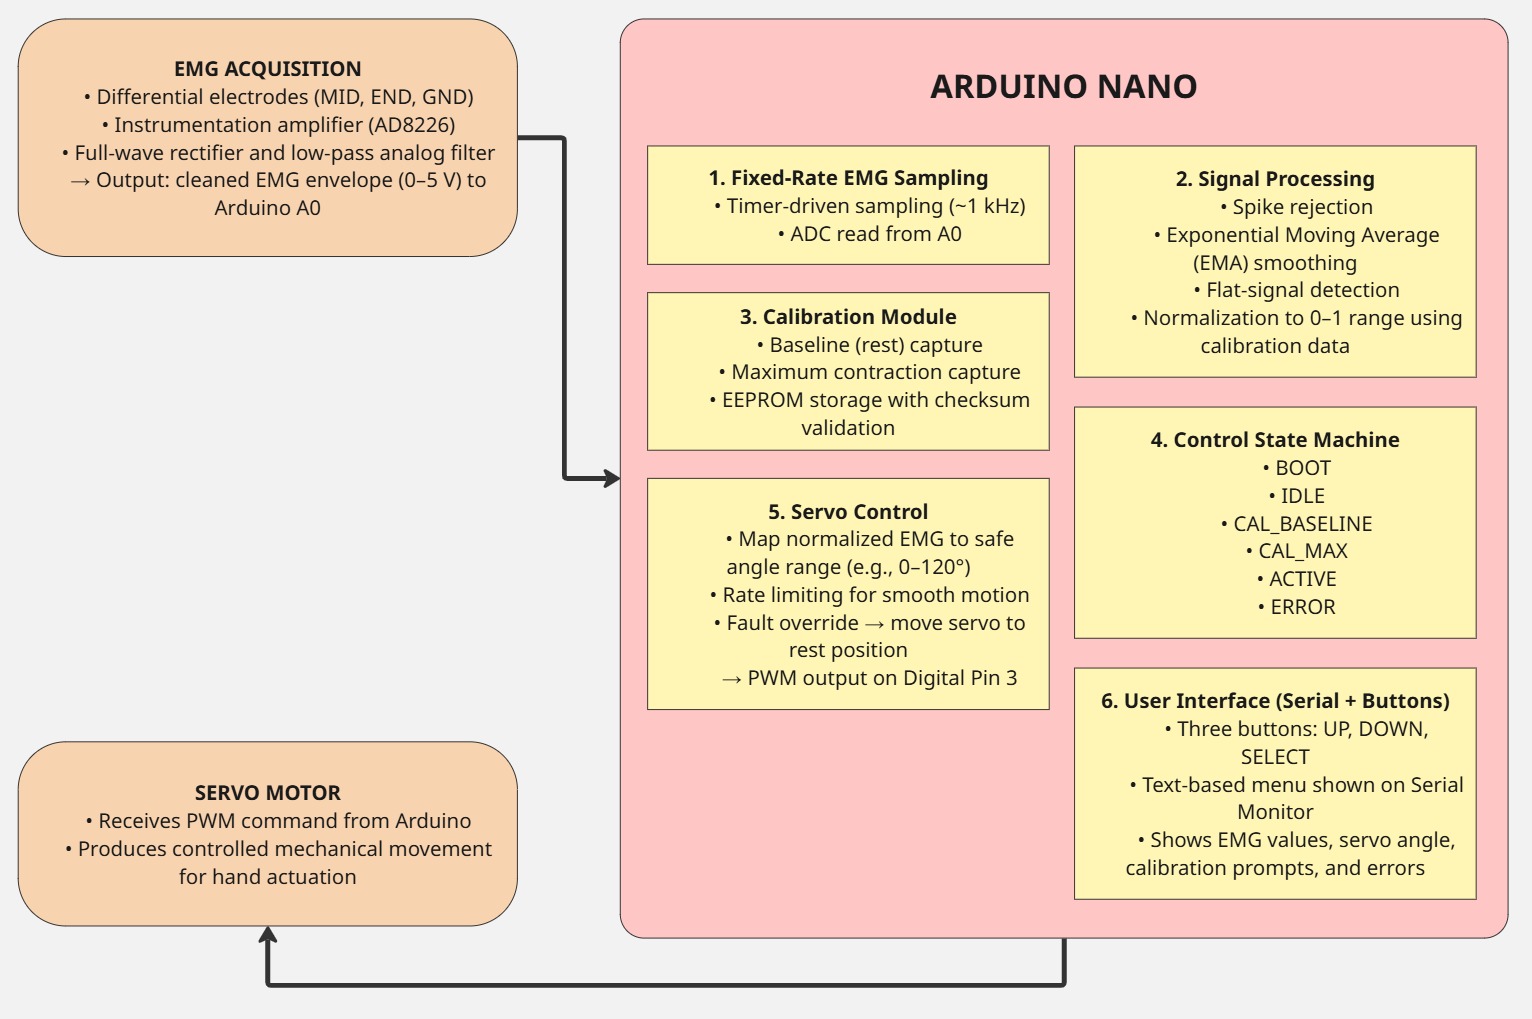
Diagram: System block diagram and control loop